Customize the AnyDesk Client Appearance - Visual Step
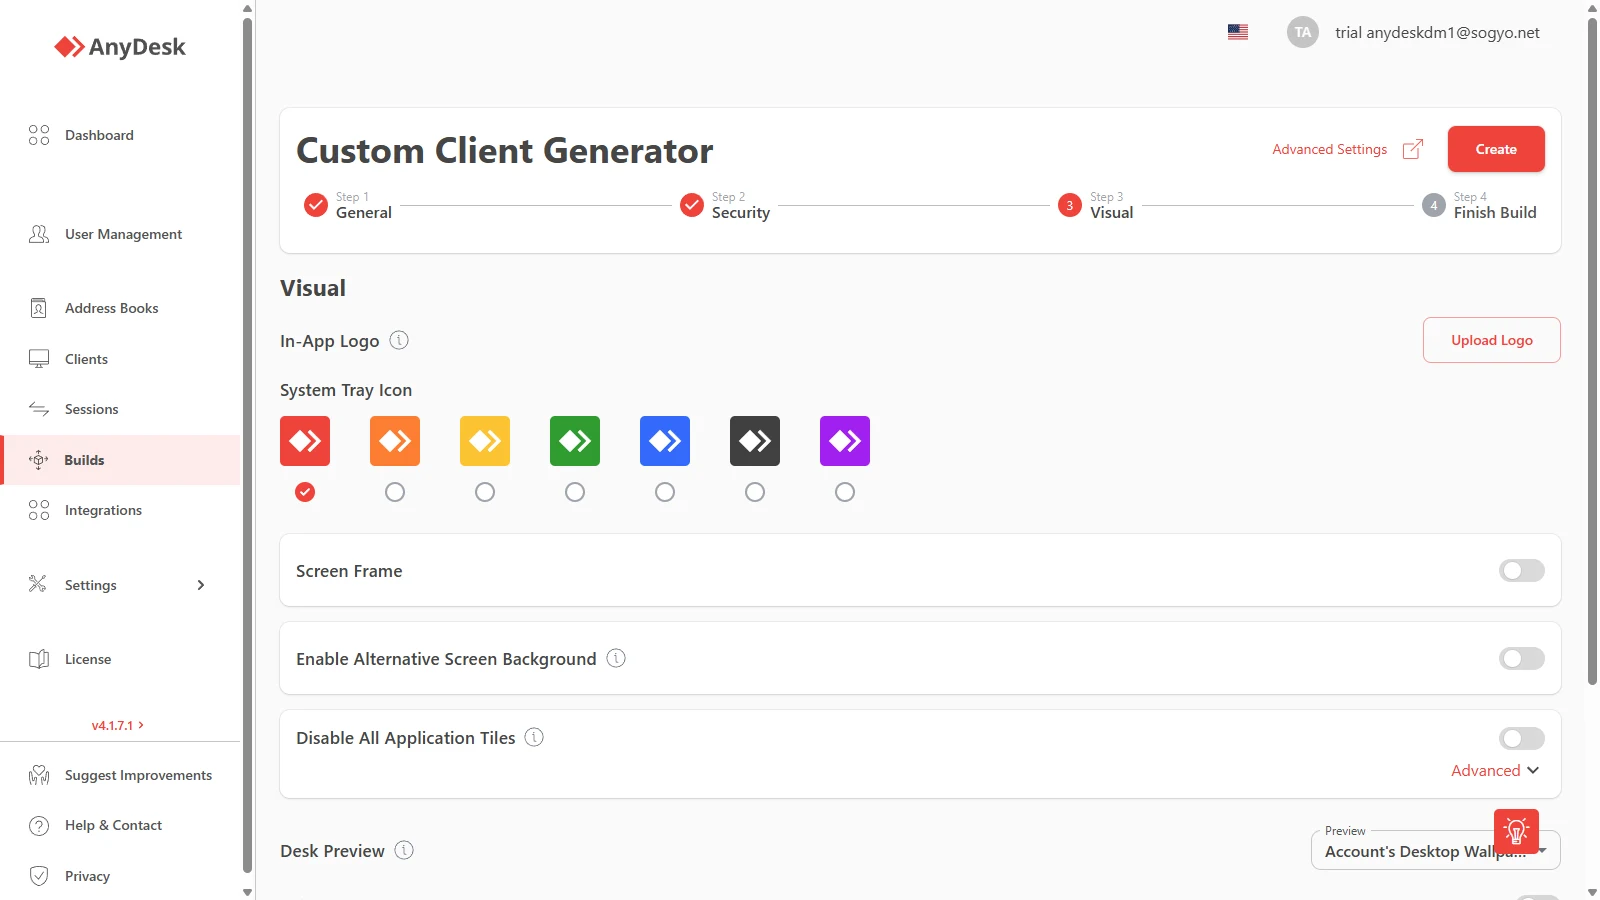
The Visual step of the my.anydesk.com Custom Client Generator defines what the client your users download will look like. None of these options change functionality, but they do change trust: a client with corporate branding generates far less resistance than a generic executable.
This guide explains every option in the Visual step, what it does and when to use it.
Video tutorial
This step explained on video:
In-App Logo
What it does: places your company logo at the top of the AnyDesk client’s main window. It’s the most visible branding element — the first thing the user sees when opening it.
How to use it: click Upload Logo and upload a 200 × 40 pixel PNG with a transparent background.
Real use case: a support company publishes the download link on its website. The end customer is wary of running an unknown .exe; when they open it and see the logo of the company they hired, the friction disappears. If you’re an MSP serving several customers, generate a different build per customer with each one’s logo.
System Tray Icon
What it does: sets the color of the icon the client shows in the Windows system tray (next to the clock). Options: red, orange, yellow, green, blue, black and purple.
Real use case: your support team serves several sites or contracts. Assign a color per build — blue for headquarters, green for the plant — and the technician instantly identifies which configuration is running on the user’s machine. It also works the other way: on kiosks or signage, a neutral color (black) goes more unnoticed.

Screen Frame
What it does: draws a frame around the AnyDesk client window. Enabling it reveals three settings:
- Width of Screen Frame: frame thickness in pixels.
- Opacity of Screen Frame: how solid it looks.
- Screen Frame Color: color in hexadecimal (e.g.
#FF0000FF).
Real use case: in call centers with many open windows, a corporate-colored frame helps the agent instantly distinguish the AnyDesk window from everything else. It also reinforces visual identity on clients handed to third parties.

Enable Alternative Screen Background
What it does: replaces the remote machine’s wallpaper with a solid color during the remote desktop session. Enabling it reveals Alternative Screen Color (hexadecimal).
Real use case: two practical benefits. Performance: a solid background transfers far less data than a photographic wallpaper — on slow connections the session feels much smoother. Privacy and professionalism: during support, the technician doesn’t see the user’s personal background (family photos, potentially inappropriate content), and in audited or recorded sessions everything looks neutral.

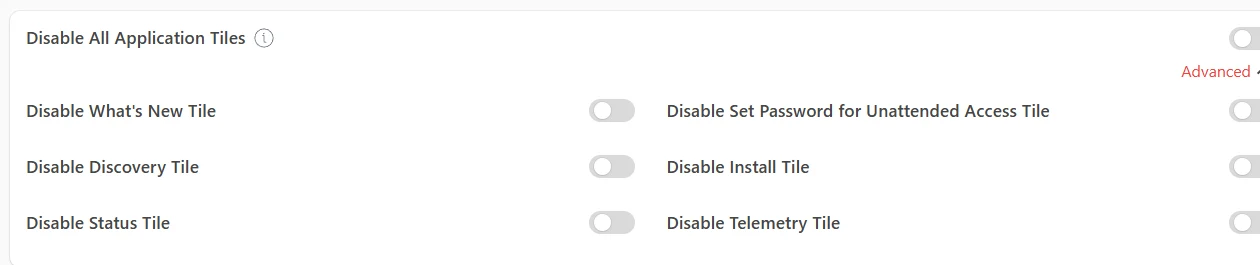
Disable All Application Tiles
What it does: hides the tiles on the AnyDesk client’s main screen. The Advanced section lets you control each tile separately:
| Tile | What it hides | When to disable it |
|---|---|---|
| What’s New | Version news | Almost always — it adds nothing for end users and generates questions |
| Discovery | Device discovery on the local network | On segmented networks or where you don’t want the user “seeing” other machines |
| Status | Connection state | When the technical status confuses more than it informs |
| Set Password for Unattended Access | Setting an unattended password | Recommended: prevents users from creating their own passwords outside IT’s control |
| Install | The install option | If the client should only run in portable mode, without installing |
| Telemetry | Telemetry and reporting | According to internal data policy |
Real use case: you hand the client to 200 non-technical users. Every visible option is a potential support call (“what’s Discovery?”, “should I set a password?”). Disabling unnecessary tiles leaves a minimal interface: the ID and the connect button. It’s especially important to disable Set Password for Unattended Access — if the user creates their own password, your team could lose access to the machine.
Desk Preview
What it does: defines which image other agents see in the address book when looking at this machine. Three options:
- Desktop Screenshot: a real capture of the machine’s desktop — a living thumbnail.
- Account’s Desktop Wallpaper: shows the account’s wallpaper, with no window content.
- None: no preview.
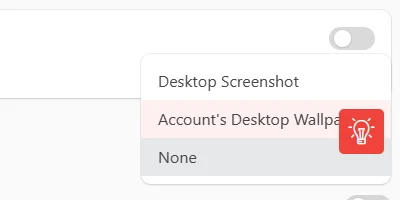
Real use case: with Desktop Screenshot, the helpdesk identifies machines instantly (“that’s the point-of-sale one, you can see the register”). But if your address book agents shouldn’t see the content of other people’s screens — for example, treasury or executive machines — use Wallpaper or None.
Edit Your Address Text
What it does: lets you customize the text the client shows next to its AnyDesk address.
Real use case: the numeric ID means nothing to the user. You can replace it with something readable like “IT Support - North Site” or the company name. When the user reads that label to a technician over the phone, communication is clearer and the user feels the tool “belongs to the company”.

Next step
With the appearance defined, click Next to go to the final step, Finish Build: there you review the complete client summary (name, platform, connection type, security) and create it with Create.
Need AnyDesk licenses for your team? Sogyo is an official AnyDesk wholesale distributor in Latin America — we help you choose the right plan and deploy custom clients at scale.
MyAnyDesk in detail series
This guide is part of the series on the my.anydesk.com Custom Client Generator:
Click to continue reading
- Published at