Select AnyDesk depending on your operating system.
Follow the on-screen instructions to complete the installation.
Repeat on each device you plan to access or manage.
💡 NOTE
AnyDesk can be used as a portable app or fully installed. Installation is recommended for features like Unattended Access and startup configuration.
Step 2. Register your license
After purchasing an AnyDesk license, you must register it in the AnyDesk Client to unlock all licensed features.
Licenses are linked to your AnyDesk account. You can register your license either by signing in to the AnyDesk client or by entering your License Key manually.
Register by signing in to your account
Open the AnyDesk app on your device.
In the upper-right corner, click the user profile icon.
Enter the my.anydesk II credentials sent to your email or used during account registration.
Click Sign In.
Once signed in, your license is activated automatically and you can use the AnyDesk client with all features available in your license.
Register with license key
Sign in to my.anydesk II using the credentials you received to your email.
Navigate to the License tab and in the About section, copy the license key.
Open the AnyDesk app on your device.
In the upper-right corner, click image.png > Change License Key….
In the Change License Key section, paste the license key from my.anydesk II and click Register license key.
Your license will be displayed in the Current License section.
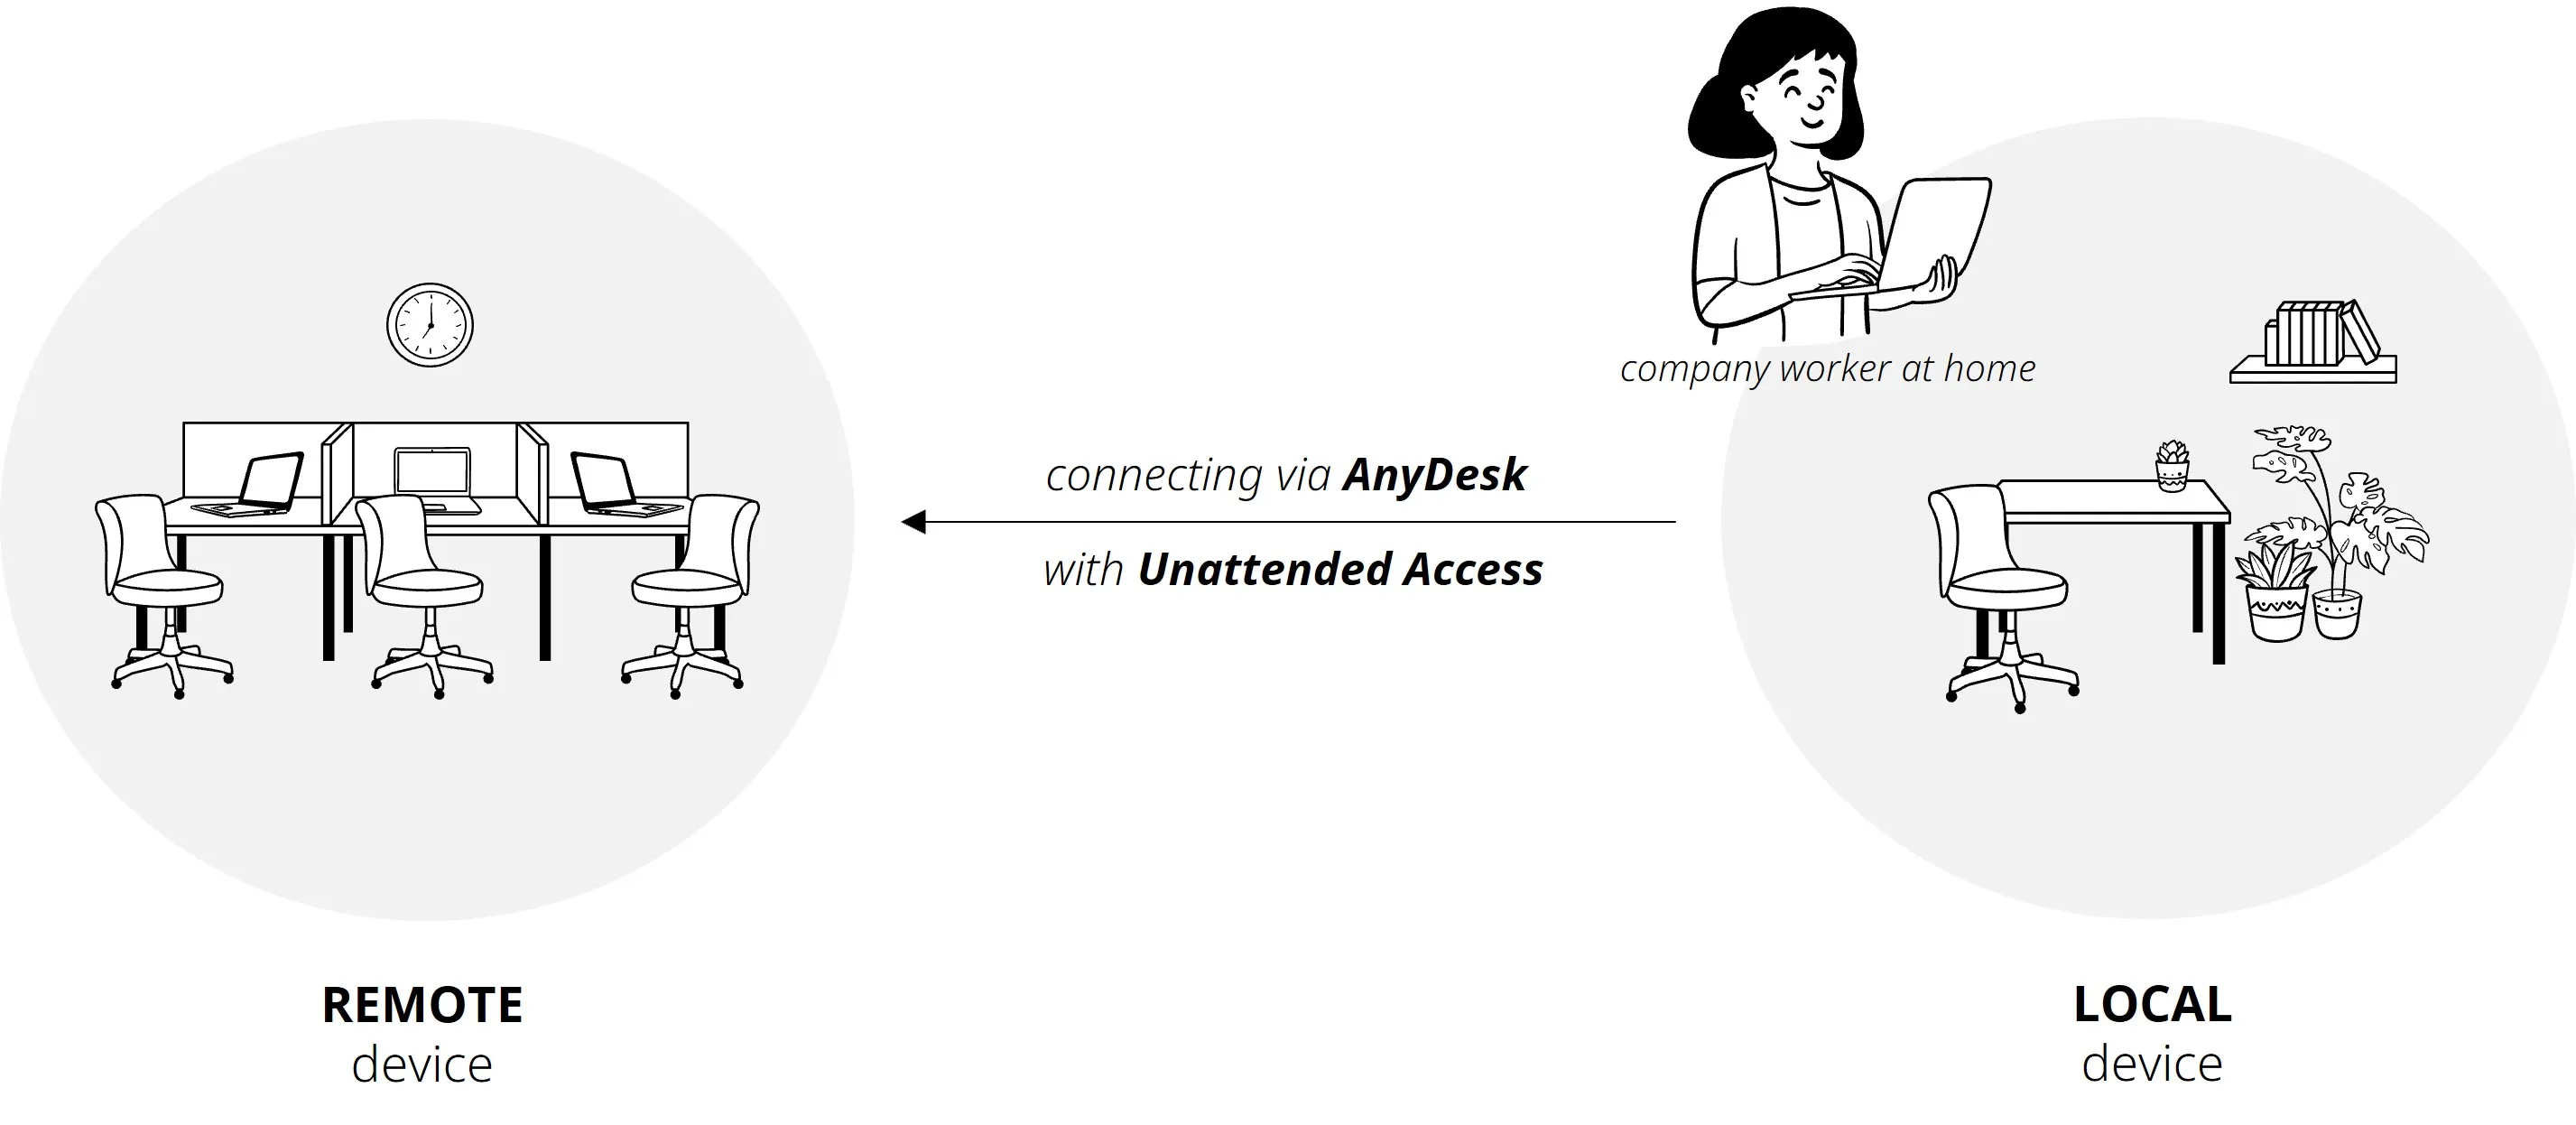
Step 3. Set up Unattended Access
Unattended Access allows you to manage and control remote devices even when no one is physically present at the remote end.
To enable Unattended Access, set up a password on the remote AnyDesk client. You can then use this password to connect from your local device.
To set up Unattended Access:
On the remote device, open AnyDesk and go to Settings > Access.
In the Unattended Access section, click Set password.
Create a secure password and click Apply.
By completing these steps, you will enable Unattended Access on your remote device, allowing you to connect and manage it remotely at any time.
Step 4. Start a session
First, make sure you install AnyDesk on both devices - local and remote.
🦉 To learn more about AnyDesk Address - ID and Alias, see this article.
To start a remote session:
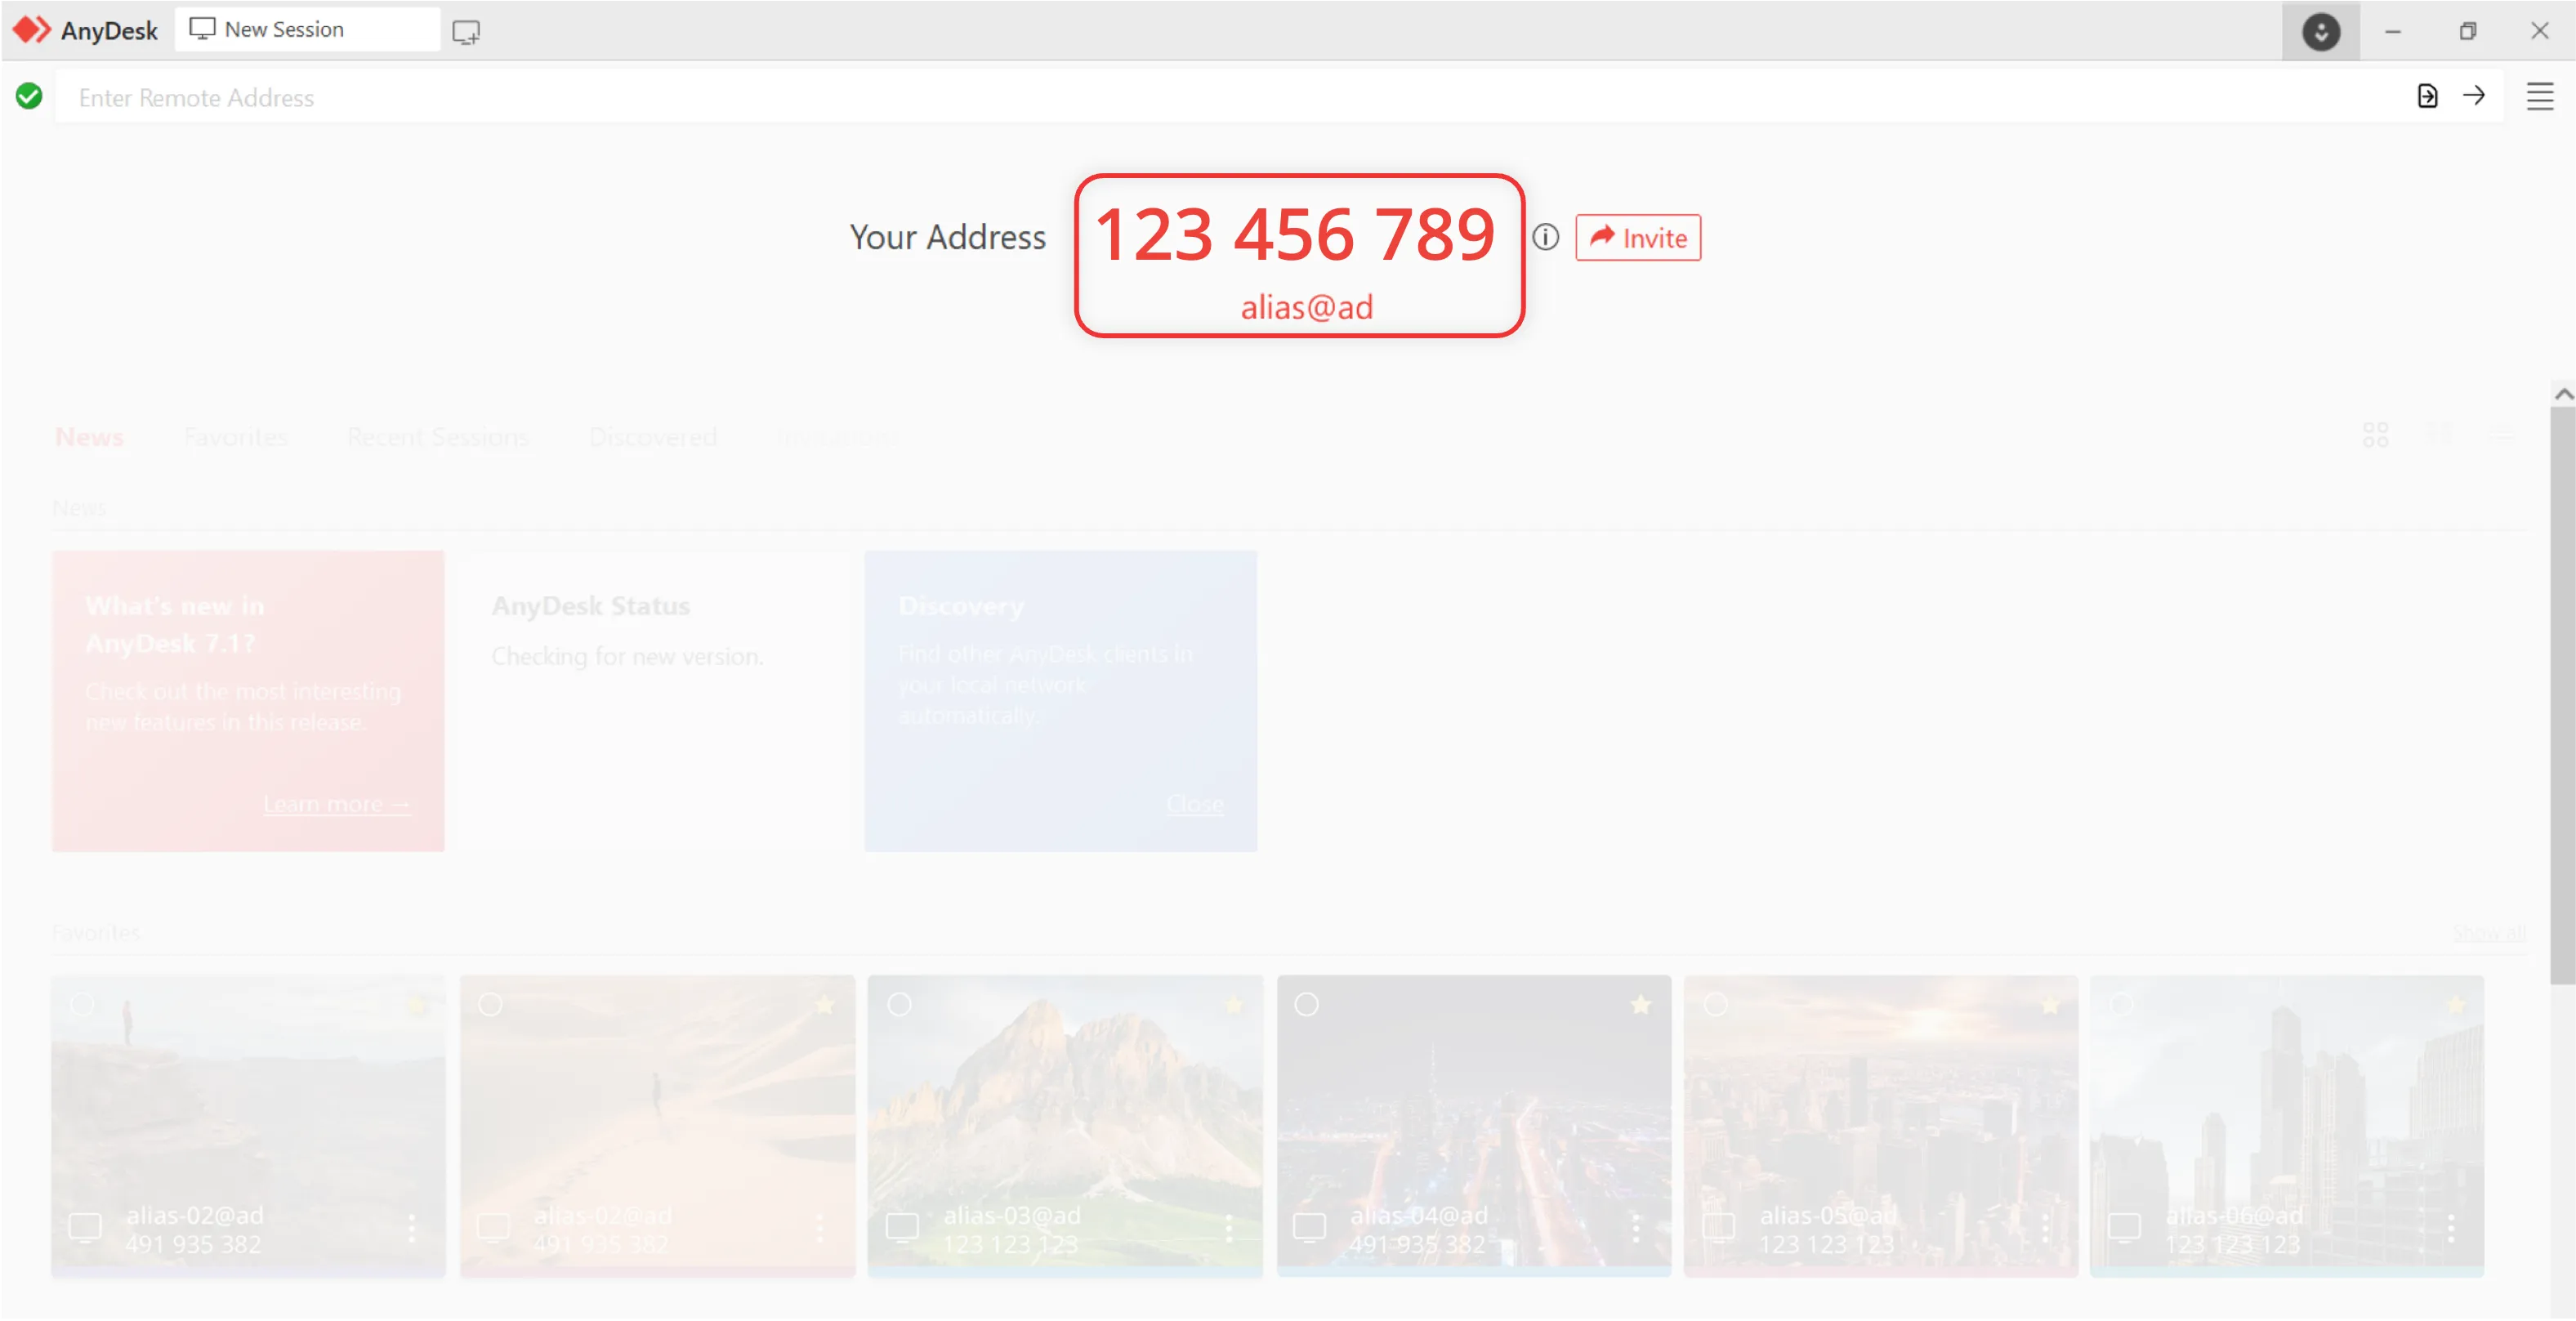
Get the remote device’s AnyDesk ID or Alias.
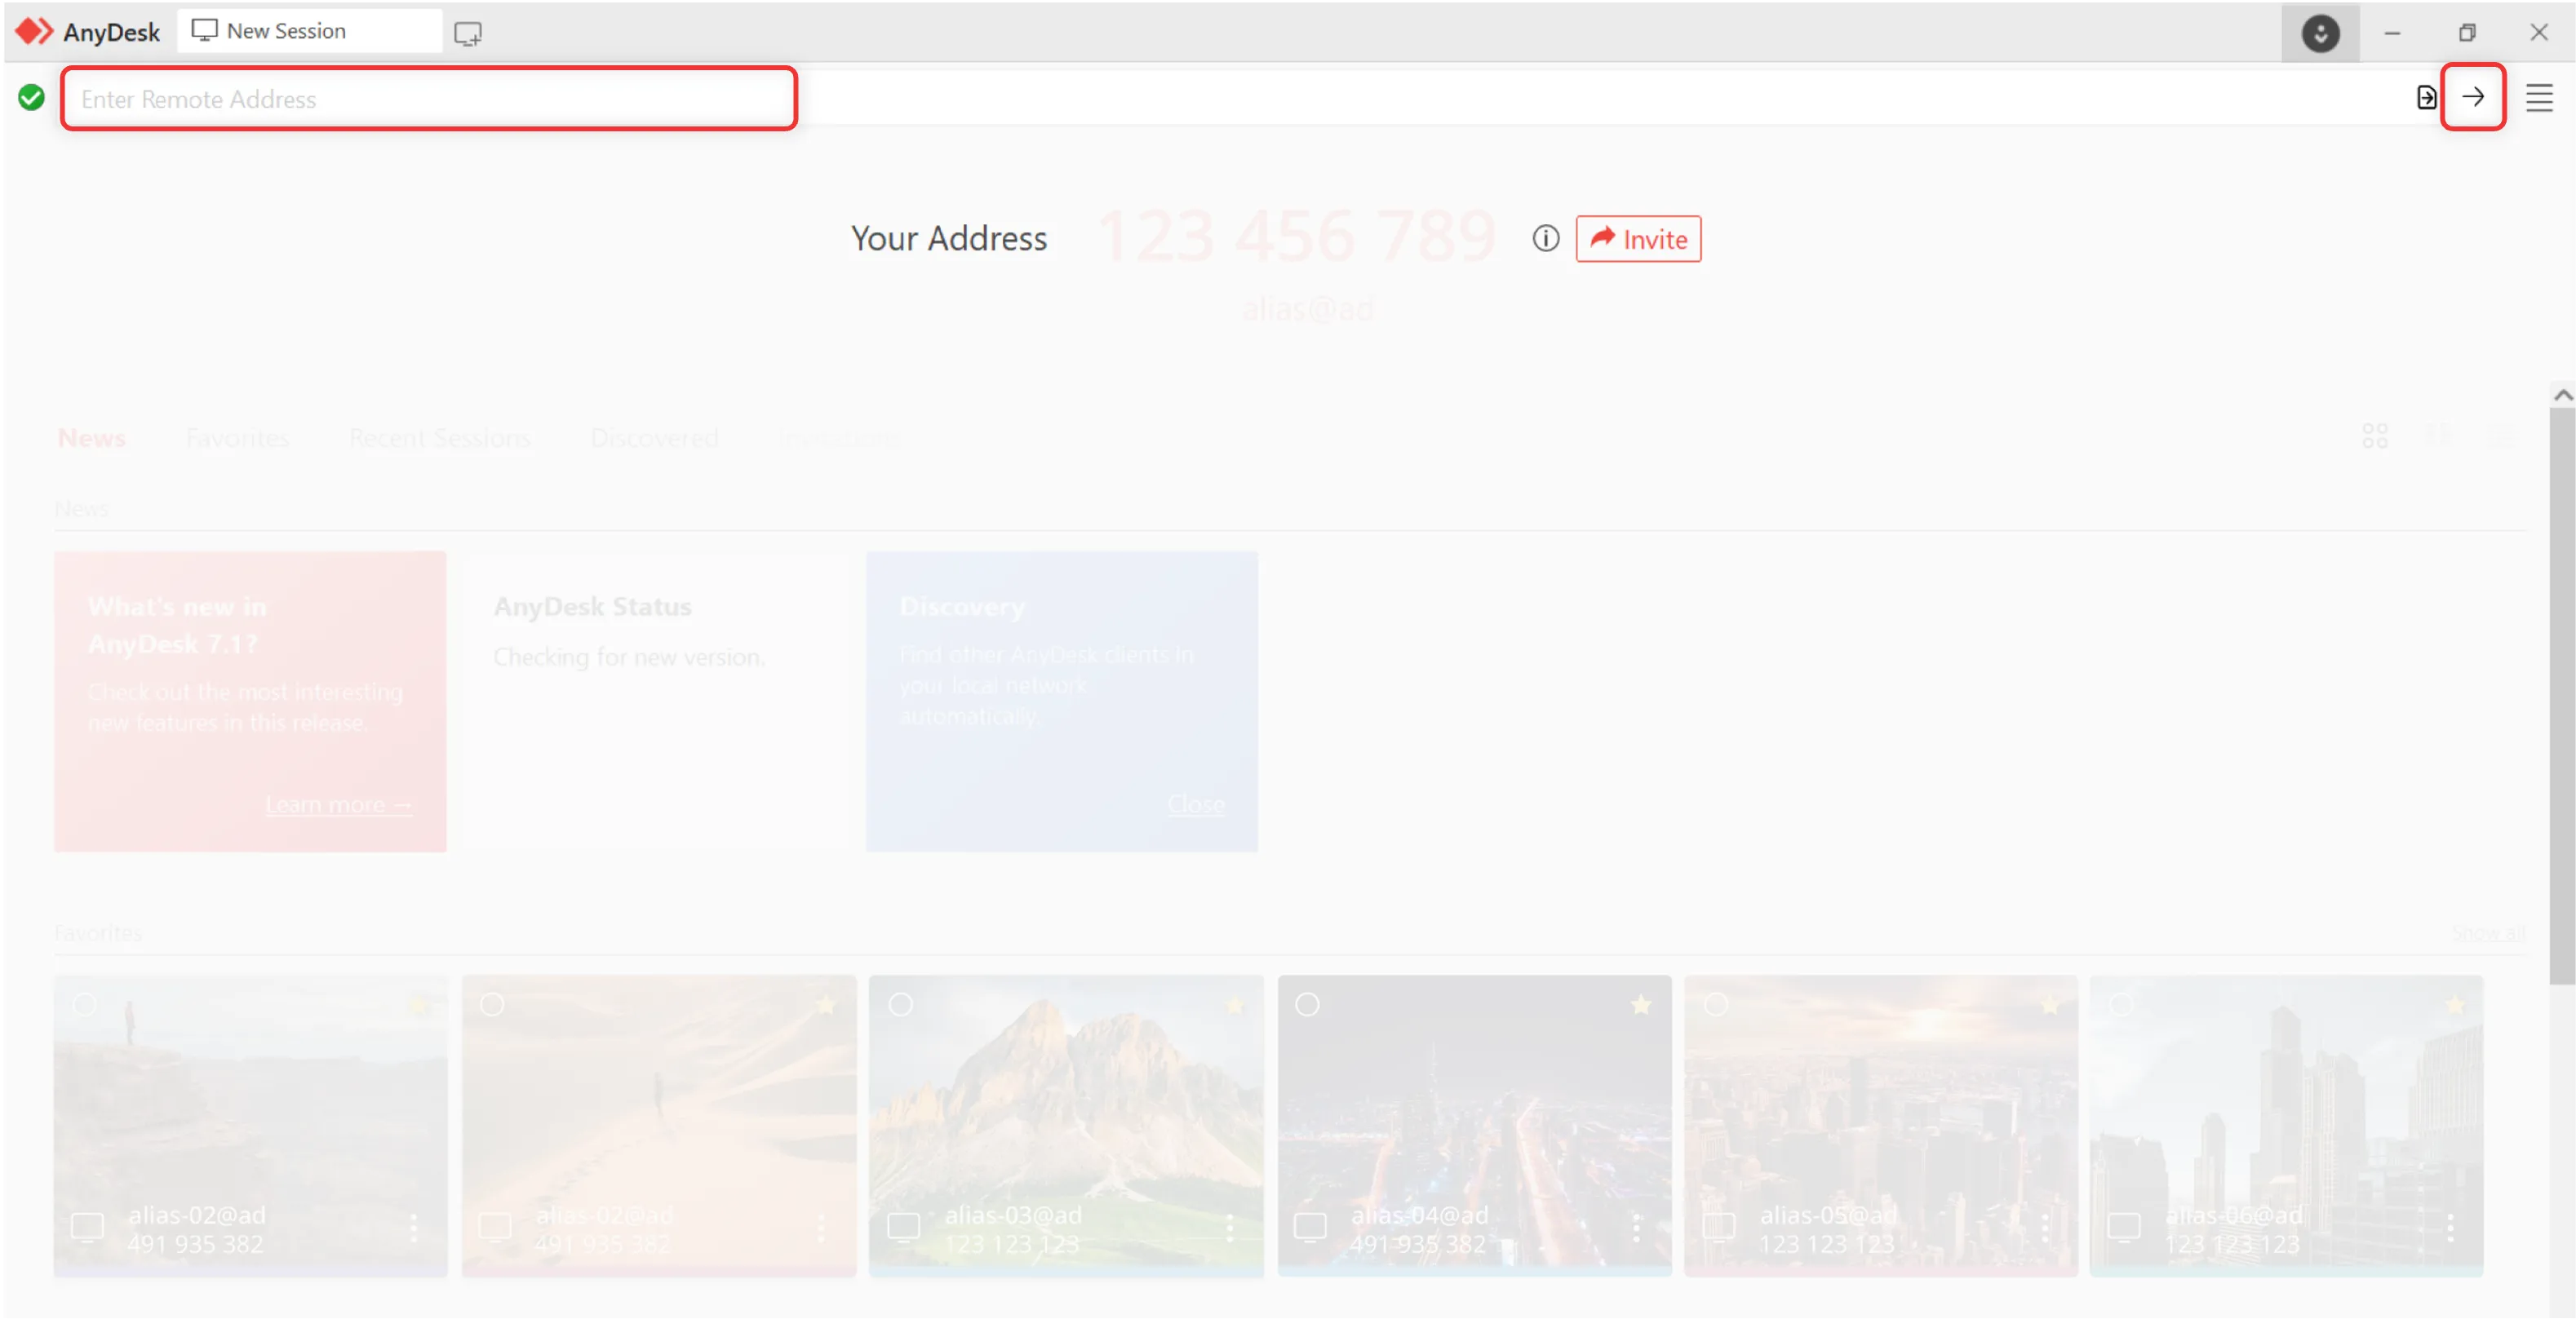
On the local device, from which you want to connect to the remote device, enter the AnyDesk ID in the Remote Address field and click or press Enter.
Depending on configuration:
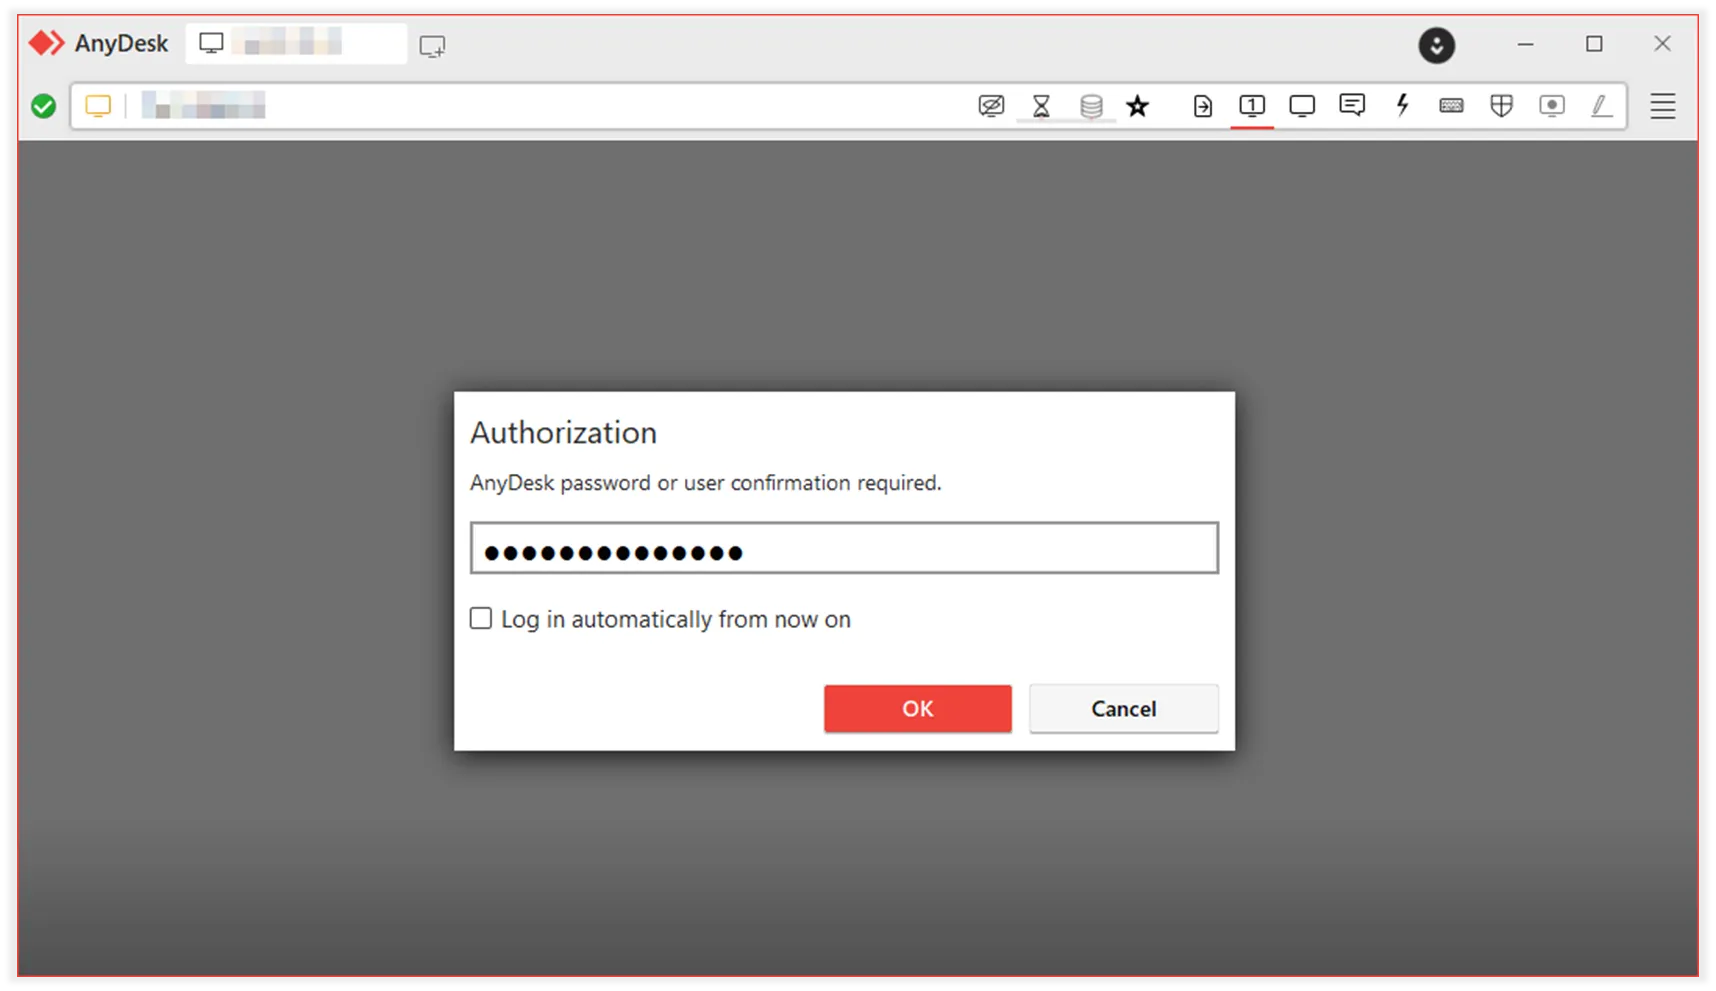
In the Authorization pop-up window, enter the Unattended Access password that you set up on the remote device in Step 3, or
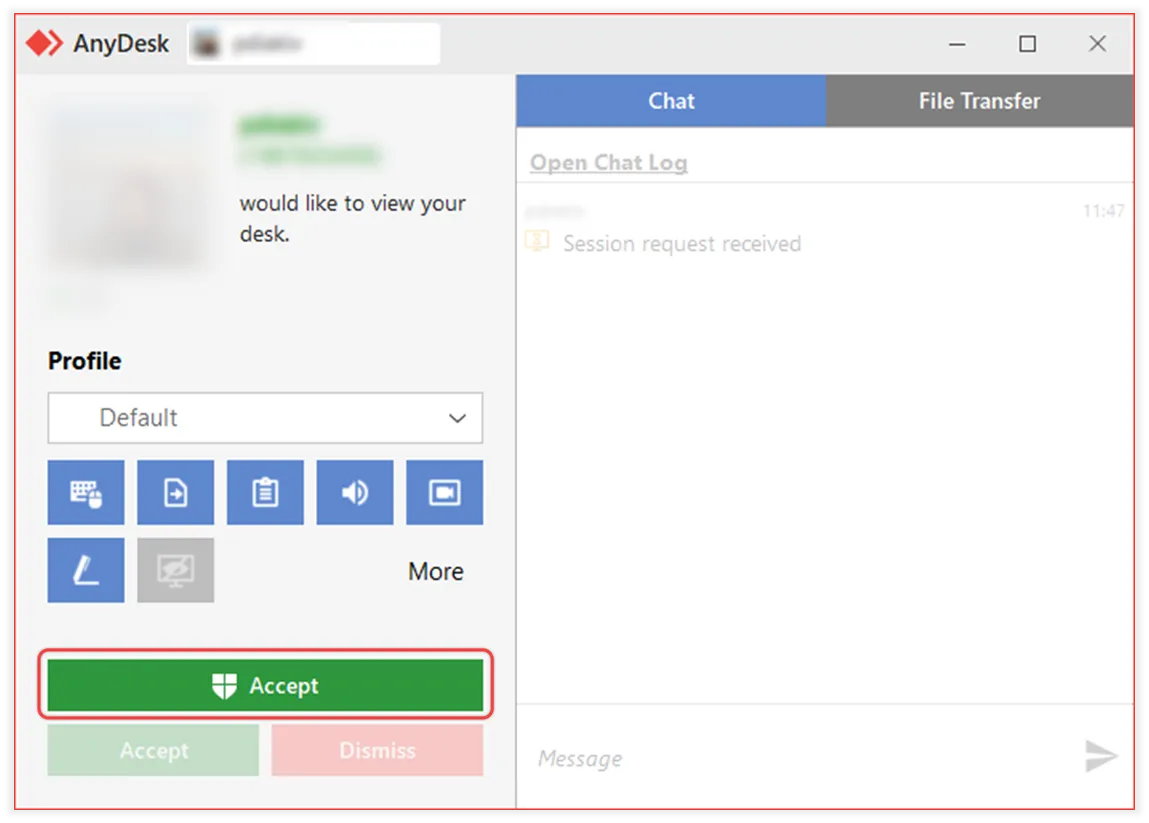
Wait for the Remote User to manually accept the request.
The session will start, and you’ll see the Remote Desktop. You can now control, transfer files, and interact as needed.
Connection request pop-up window on theremotedevice
Step 5. End a remote session
You can end a remote session at any time, either from the local (controlling) device or the remote (controlled) device.
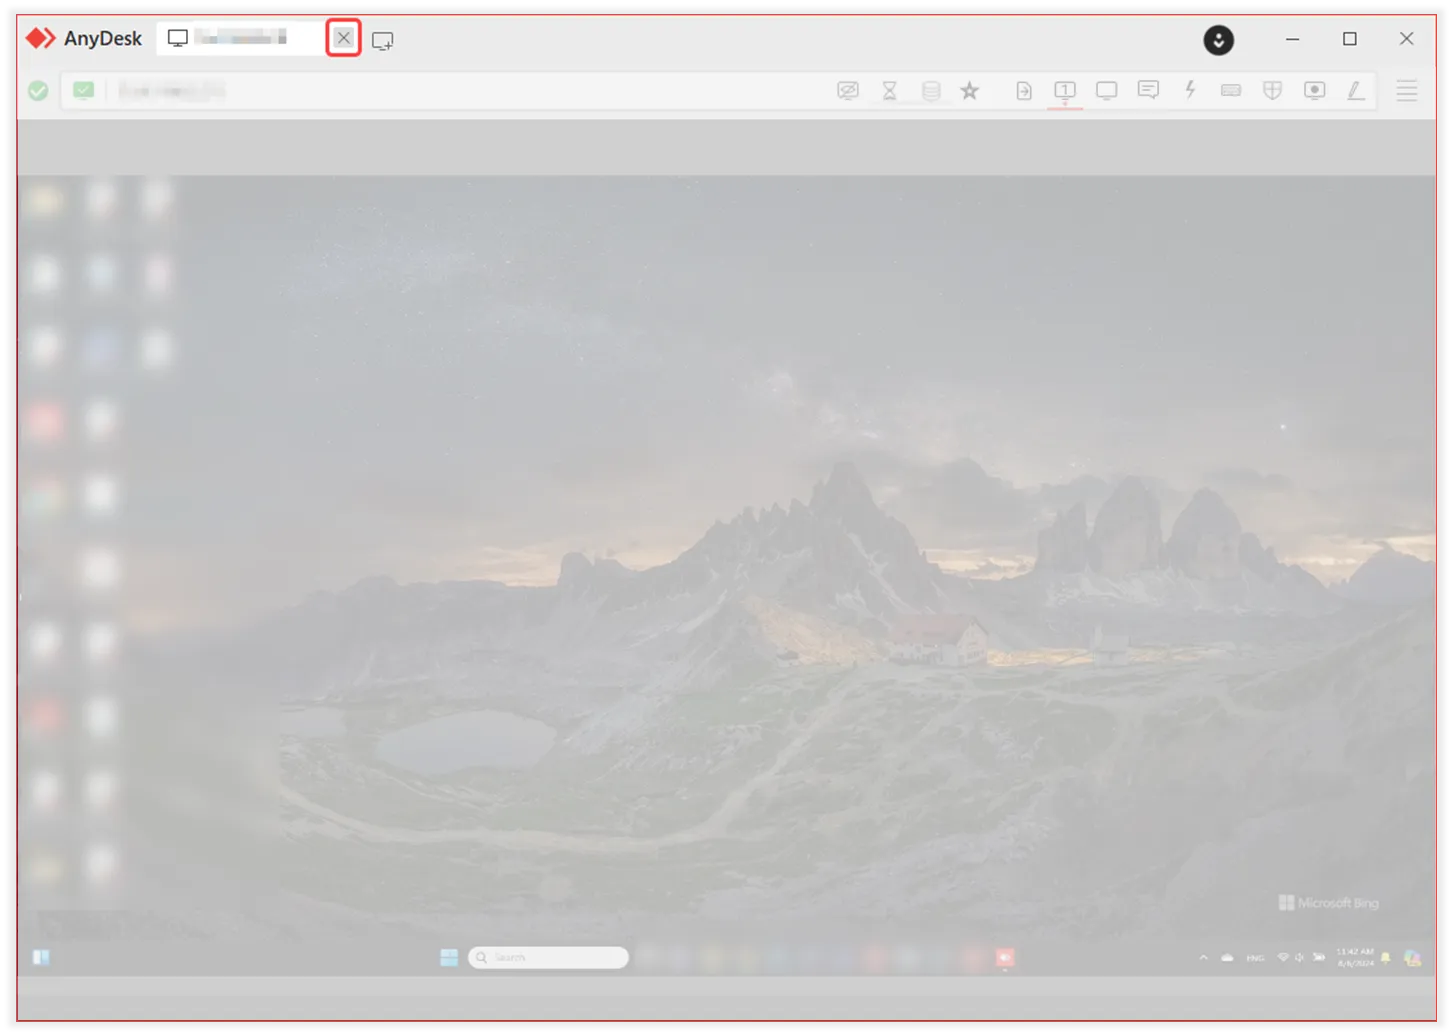
End session from the local device
In the AnyDesk client, locate the active session tab at the top.
Click on the session tab.
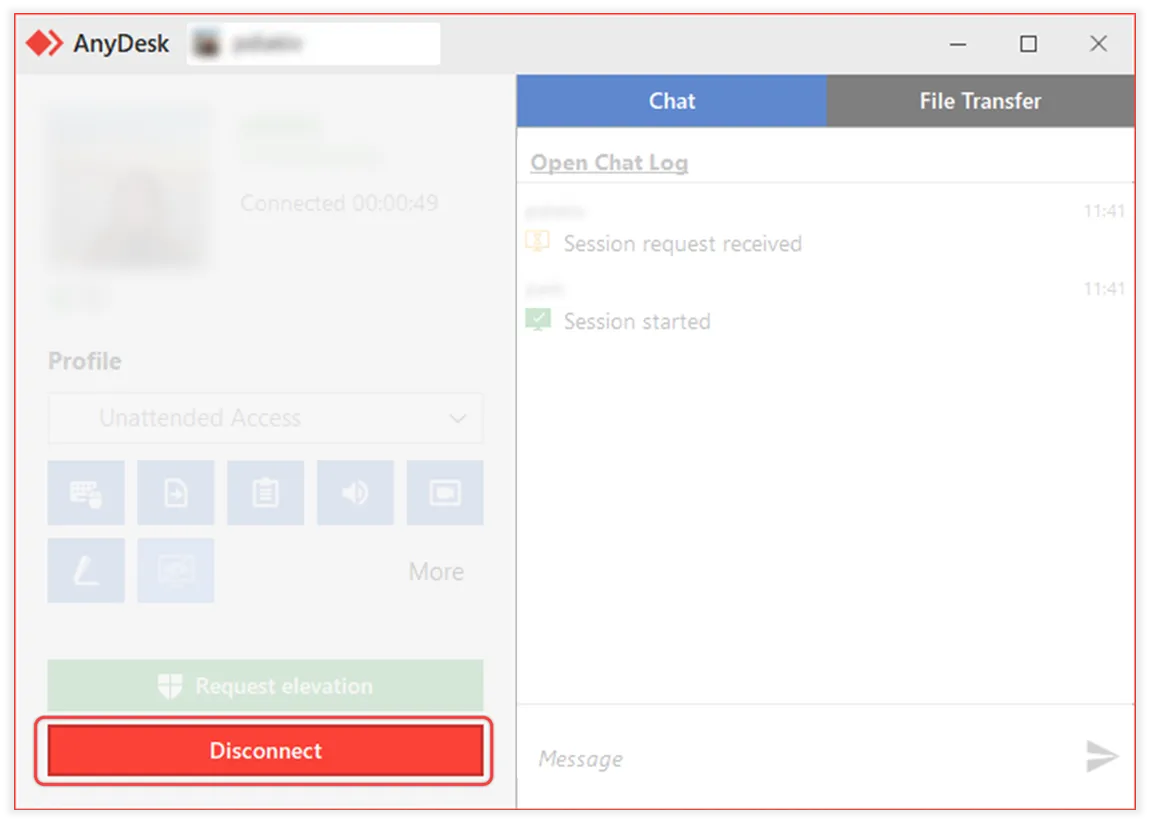
End session from the remote device
In the session control window, click Disconnect to end the session immediately.
🦉 You can also end a session directly from my.anydesk if you have an account. For details, see this article.
Advanced setup
For IT administrators and support teams, AnyDesk provides advanced configuration options to streamline deployment and management across your Organization. Use the resources below to set up and customize AnyDesk for your employees:
Configure user and role management - set up your team or organization structure and assign roles.
Set up Single Sign-On (SSO) - enable secure and centralized login for employees using your identity provider.
Create custom AnyDesk clients - pre-configure AnyDesk clients with aliases, permissions, and default settings. You can also set up a custom Namespace and apply branding.
Deploy via Group Policy or MSI - roll out AnyDesk across multiple devices using standard deployment tools.
A feature that allows connections to a remote device without requiring manual approval on the other end, enabling access using just a password.
The AnyDesk application installed and running on a device, used to connect to or receive remote sessions.
A unique code used to activate your AnyDesk license and give you access to all the features included in it.
A unique number automatically assigned to each installed AnyDesk app. It’s used to identify the device and connect to it remotely.
A name-based address used to identify a device in AnyDesk. Unlike the AnyDesk ID, which is a numerical address, the Alias uses a username and a Namespace (e.g. name@namespace) to make devices easier to recognize and manage.
An individual whose device is being accessed or controlled by someone else using AnyDesk.
The ability to access and control a device from a different location using AnyDesk, facilitating remote support and work.
A management portal where users can check their license information, view and manage AnyDesk clients linked to the account, find more detailed information about all sessions, and more.
A list of users belonging to one company. A user can be a part of one organization. If you are assigned to an organization, you can use Single Sign-On feature to sign in to my.anydesk.
A custom AnyDesk domain used to identify devices and enhance security. It helps control access by allowing only trusted devices within the same domain to connect to you.
A version of AnyDesk client used for installation on Windows. It cannot be run in a portable mode. As it is an installer package, running the MSI would install AnyDesk on the device.