Step-by-Step Guide to Setting Up a Team with AnyDesk II: Creating a Team, Inviting Users, and Managing Licenses
PDFCreating a Team
This feature is available for users with a Standard or Advanced license.
In MY.AnyDesk II, you have the ability to set up your team. Only users you invite will be able to join your team and access the license features.

Creating a Team
Once you’ve purchased a Standard, Advanced, or Performance license, you will receive two emails - one from MY.AnyDesk I and the other from MY.AnyDesk II. As the license owner, you’ll have the ability to configure your team and manage licensed users in the MY.AnyDesk II management console.
To create a team:
- Check your email and follow the verification and password setting link provided by MY.AnyDesk II.
- Create a password for your account, then click Continue.
- Sign in with your login and password on the next page, then click Sign in.
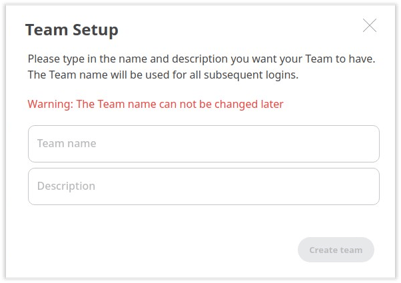
- In the Team Setup window, input the following information:
- Team Name - Enter the name of your team.
-
Description - Provide a brief description of your team.
- Click Create Team.
You can now send invitations to users to join your team; these users will then become part of your license.
Click to continue reading
- Published at